Getting Started
ImageBoss resizes, compresses, and delivers your images through a global CDN—all through URL parameters. Point your image URLs at ImageBoss and get the right size and format for every device, without changing your backend.
How it works
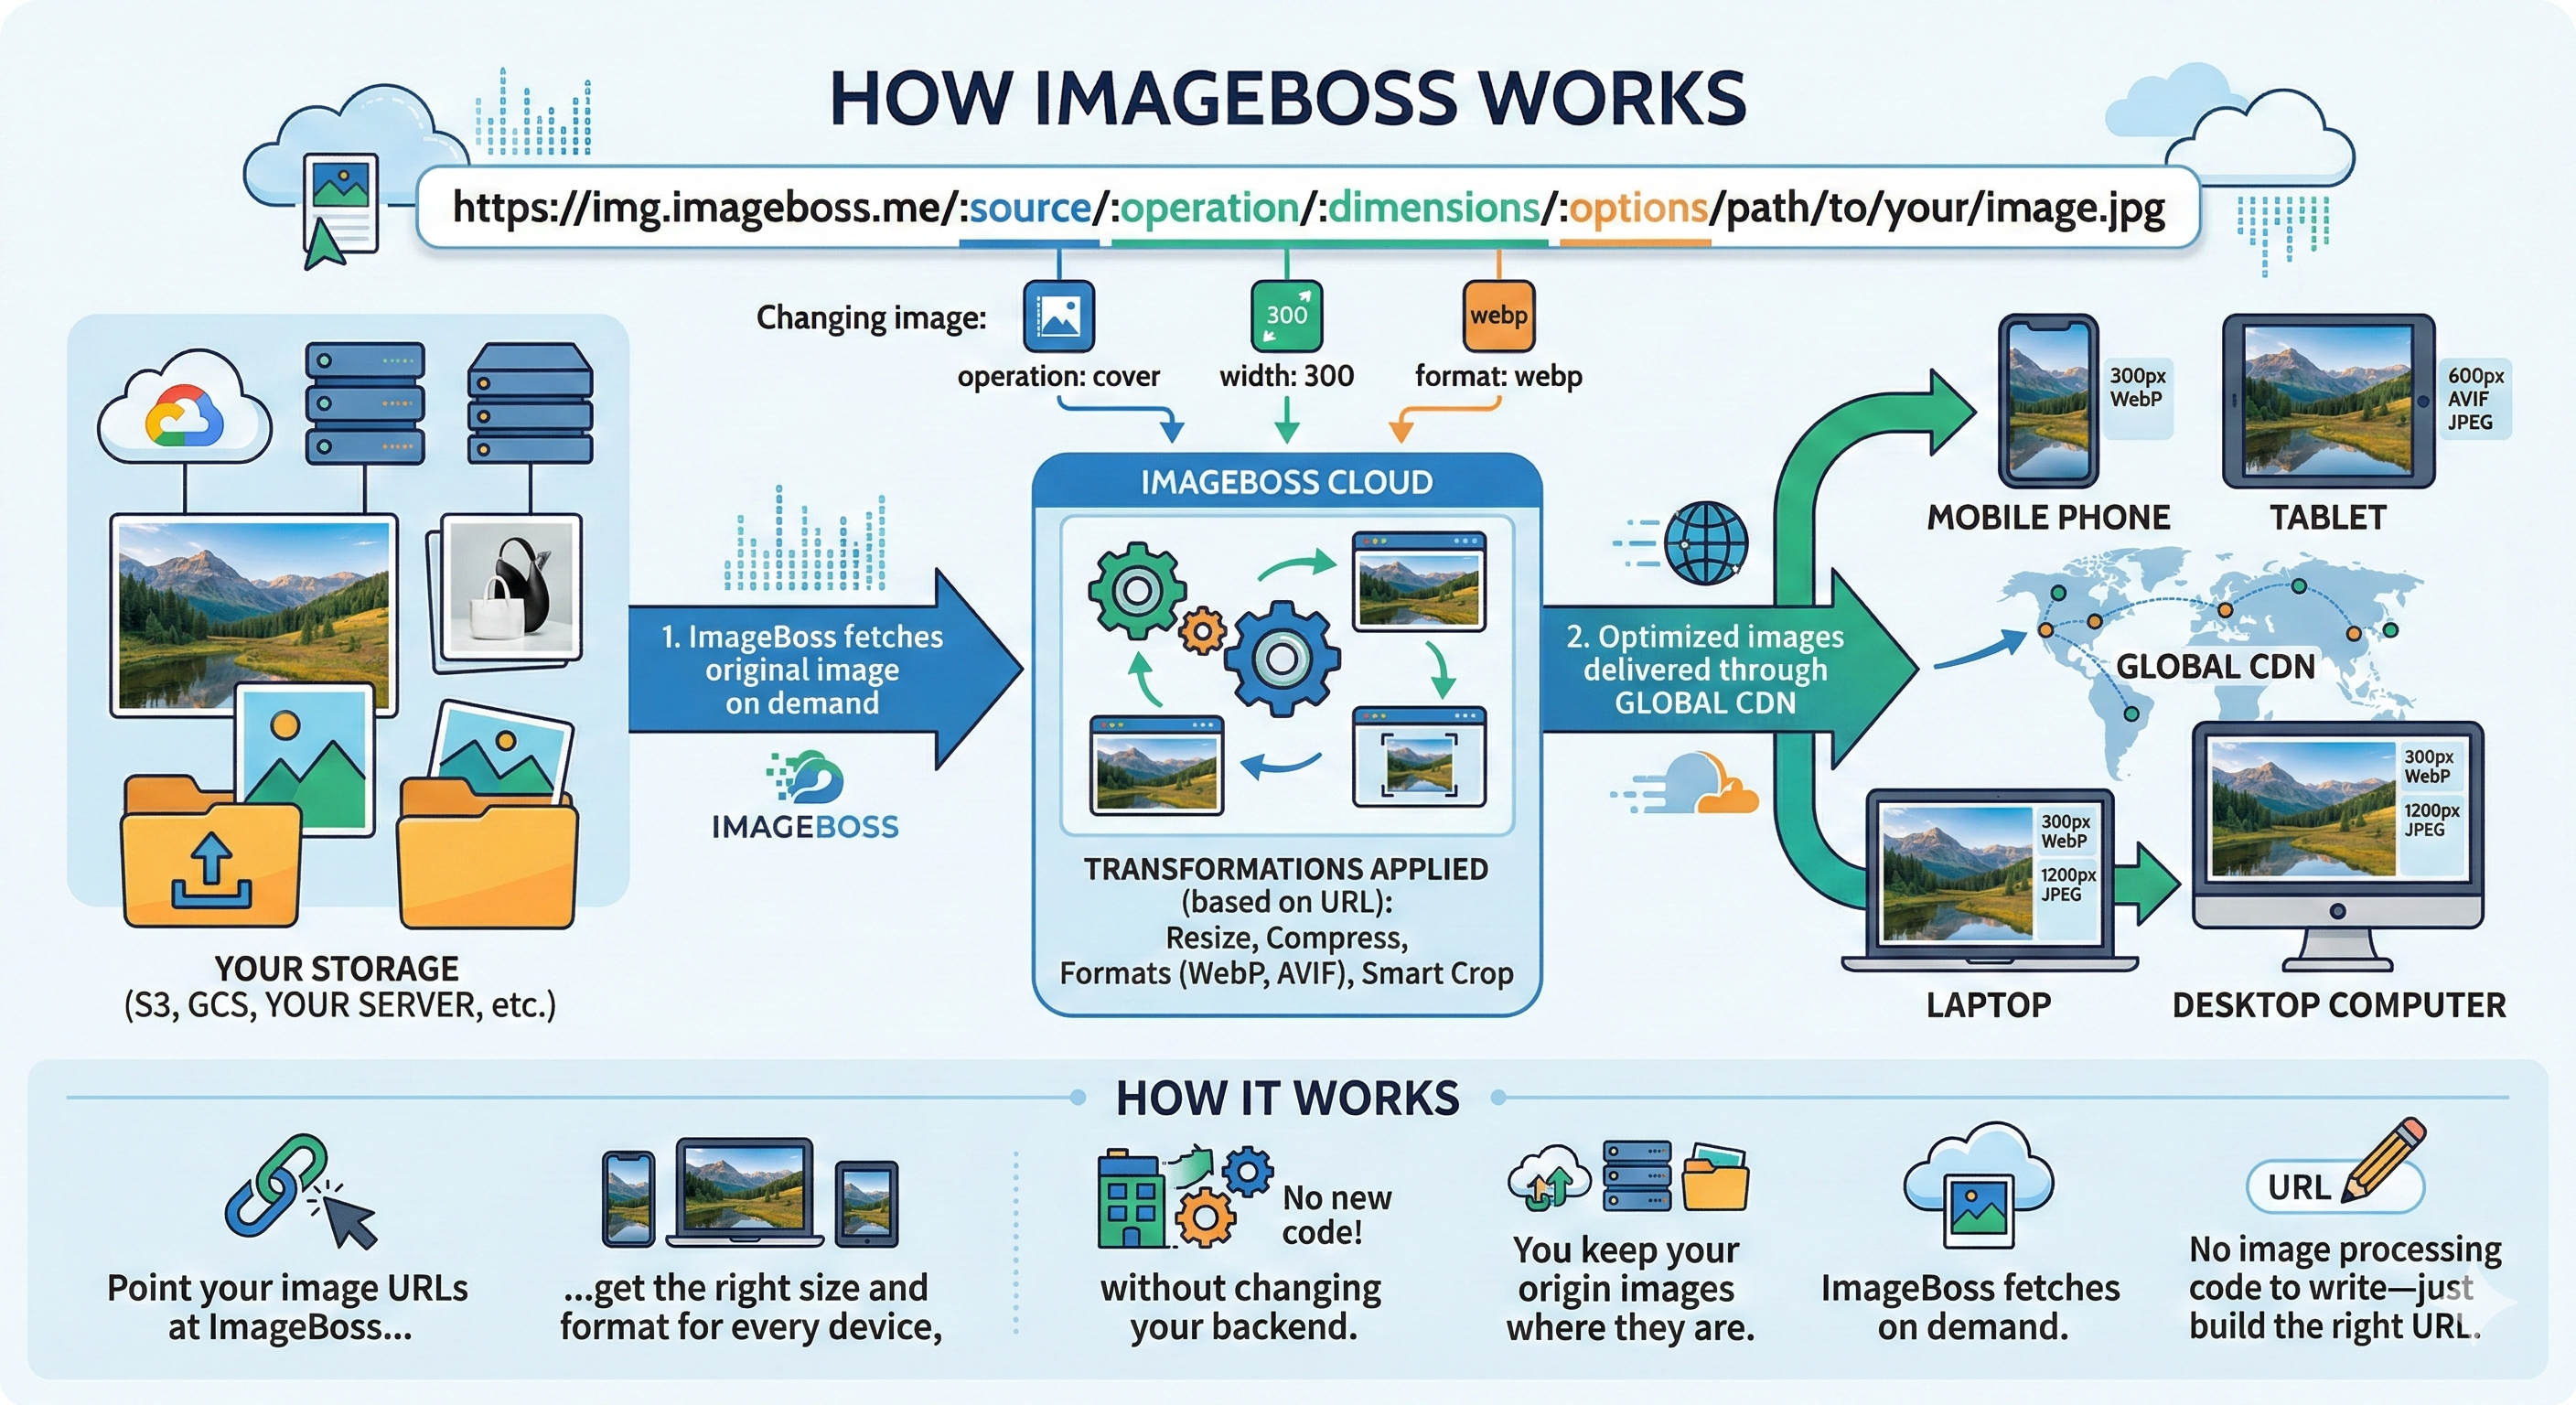
You keep your origin images where they are (S3, your server, WordPress, etc.). ImageBoss fetches them on demand, applies the transformations you specify in the URL, and serves the result. No image processing code to write—just build the right URL.
https://img.imageboss.me /:source /:operation /:dimensions /path/to/your/image.jpg
- :source — The image source you configure in your dashboard (e.g. an S3 bucket or your site).
- :operation — The transformation:
cover,width,height, orcdn(pass-through). - :dimensions — Output size (e.g.
500x500,800x). - — Optional: format, quality, and other settings (comma-separated).
Once your source is connected, using ImageBoss is just string interpolation: take your existing image path and put the service URL, source name, operation, and dimensions in front of it.
In this guide
1. Create an account
Sign up for a free trial. You get 10 days to try everything; after the trial, your usage resets so you can keep evaluating.
2. Connect your image source
ImageBoss needs to know where your images live. You add a source in the dashboard—each source gets a unique prefix (e.g. mywebsite-images) and becomes the :source part of your URLs: https://img.imageboss.me/mywebsite-images/…
Images on the web or in the cloud
If your images are already on the Internet or on Amazon S3, Google Cloud Storage, DigitalOcean Spaces, Cloudflare R2, Akamai Object Storage, Wasabi, Azure Blob, or Azure File Share, you're almost set. In the dashboard go to Sources → Add Source → choose the type that matches your storage.
Images only on localhost
If your images are not accessible from the Internet (e.g. only via localhost), use a tunnel such as Ngrok so ImageBoss can reach them. After you have a tunnel URL (e.g. https://abc123.ngrok.io), add a Source of type Web Proxy pointing to that URL. ImageBoss will then fetch and transform your local images.
3. Choose how to integrate

Use a library or plugin
We provide integrations for WordPress, Shopify, Magento, Ruby, Rails, React, Vue.js, Go, Elixir, and JavaScript/Node. Pick the one for your stack and follow its docs to generate ImageBoss URLs automatically.
Build URLs yourself
No library needed: take your current image URL and prefix the ImageBoss parts. If your image is at /images/photo.jpg, an ImageBoss URL could look like:
https://img.imageboss.me /mywebsite-images /cover /500x500 /images/photo.jpg
Try it live
Use the tool below to change the operation, dimensions, and options. The URL updates as you edit—that’s the same URL you’d use in your app.
Next: explore Operations (cover, width, height), Filters, and Integrations for your stack.